Felt Food – Part One
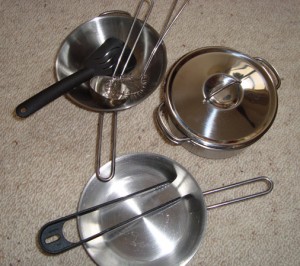
I’ve finally started the mission of making felt food for my little girl. I had to as we received this wonderful package from my parents that contained these little stainless steel cooking pots and pans and a set of utensils to go with them. (These are from Ikea’s Duktig range for kids 4 Piece cooking set + kitchen utensil set).
I’ve looked at getting her some plastic play food, but they were either too expensive or not durable enough. Then I looked at the wooden options. They were really cool, but they were too expensive as well.
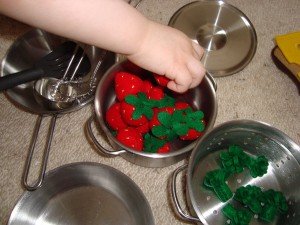
One day, I happened onto keeperofthecheerios.com and found a whole list of felt food patterns – both free and ones you have to pay for. I decided to start with something easy – strawberries. I used the pattern from ikatbag.
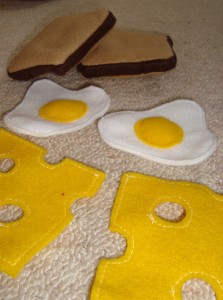
Then I decided to make some eggs, cheese and bread. I just winged it as I don’t have patterns for these. They were pretty easy to make on the sewing machine.
Cheese: Cut a square/rectangle/triangle of yellow felt. Mark out the holes. Stitch around edges and the holes.
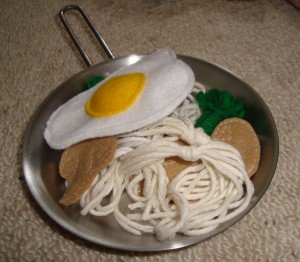
Eggs: Cut 2 white blobby shapes (I pinned 2 pieces together, drew the blob and cut out the shape). Cut 1 circle in yellow. Stitch the circle to one piece of white – stuff the yolk a with a little padding and stitch the yolk closed. Put the other white piece on the bottom and stitch around the edges of the white.
Bread slices: Cut 2 pieces of tan squares/rectangles. Cut one long strip of dark brown felt. Estimate for about a 1cm thick slice of bread, so allow some room for seam allowance. Stitch the long dark brown piece to the sides of one of the tan pieces. When you get back to the starting point, overlap it by about 1cm. Do the same for the 2nd piece but leave about a 1-inch gap to turn the piece out. Stuff lightly and sew the gap shut.
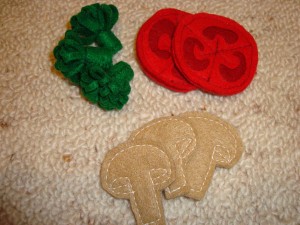
Next, I made some mushroom slices, broccoli florets and tomato slices. For the tomatoes, I followed the tutorial from oneinchworld.com.
Mushroom slices: Fold some tan felt. Draw on a shape of a mushroom. Stitch around the edges and shape under the mushroom cap a little. Cut out the stitched mushroom.
Broccoli florets: Cut out a strip of green felt about 2 inches wide and 3.5 inches long. Fold lengthwise and make 0.75cm-1cm snips across the fold about 3mm apart. Fold both the left and right sides into the center. Roll tightly and stitch the side of the stem closed. Fluff the green tops.
Noodles: These are just scraps of knitting yarn in cream and white tied together in the middle.
Pizza was next on the list.
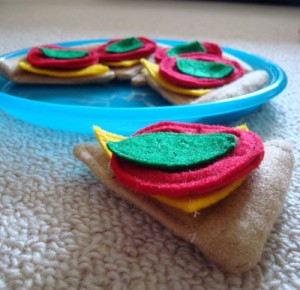
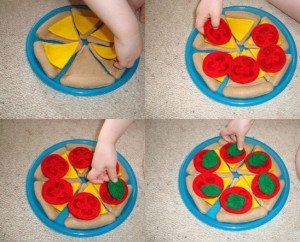
Pizza base: I drew a circle using the blue plate on 2 pieces of tan felt (that’s why it fits in the plate perfectly). Pin and cut out the circle. Divide into 6 slices. Pin and cut. Stitch around each piece leaving about 2 cm so you can flip it inside out. Push some stuffing toward the round edge. Hold the stuffing in place and stitch to create a stuffed-edge effect. Stitch the triangle outline and close the seam. Do the same for the other 5 slices.
Pizza cheese: Trace a smaller circle onto yellow felt. Cut out and divide into 6 slices. Trim to fit the base slices. Stitch around the edges. Cut holes and stitch round the holes if you wish it to be swiss cheese. You don’t have to stitch if you don’t want to, just cut out the shape.
Basil leaves: Draw a basil leaf shape onto green felt. Stitch round the edges and add leaf “markings”. Cut out the shape.
There are a variety of patterns out there, but I do find it easier to visualise the food item in my mind and then just draw, cut and stitch it. Of course, there will be the occasional disaster.
Call me unconventional, but winging it usually works out fine, and my little one does not seem to mind.
7 Responses
That is so awesome! Miss S is one blessed little girl to have a mum like you that goes so far beyond and lovingly so!
Well… this felt thing is strangely addictive. And I am having a lot of fun and the big grin on her face just makes it more special.
Awesome felt food! You have totally inspired me! I started making some, completed the bread and got stuck on the tomatoes! Your ones look amazing, so I will have to try again!
Thanks! I hope that you’ll have heaps of fun creating felt food for your child.
I can’t get over how cute these are! I love the broccoli!
How adorable! And your little one will probably not be putting these in her mouth, like she would the plastic ones! I must remember these, for when my granddaughter is big enough to enjoy them. Oops, I better get started now, or they won’t be finished in five years!
I should make some of these since everything I cook ends up tasting like felt anyway.
Very cute!